Upgrade to Relay for teams
Relay is entirely funded by subscriptions from our users. We don't sell your data or show you advertisements. If you like what we're doing and you want to see us continue, we'd love to have your support.
Relay's free tier supports up to 3 users per server. When your team grows beyond that, or when you need to sync images, PDFs, and other file types, upgrading to Relay for Teams unlocks these capabilities.
Follow these steps to upgrade your server to a paid subscription.
Before you start
- You must be the Owner of the Relay Server to upgrade
- Have a payment method ready (credit/debit card)
- Current pricing available at relay.md/pricing
- Remember that the subscription applies to a single server, not to your vault or all servers associated with your account.
Step-by-step upgrade process
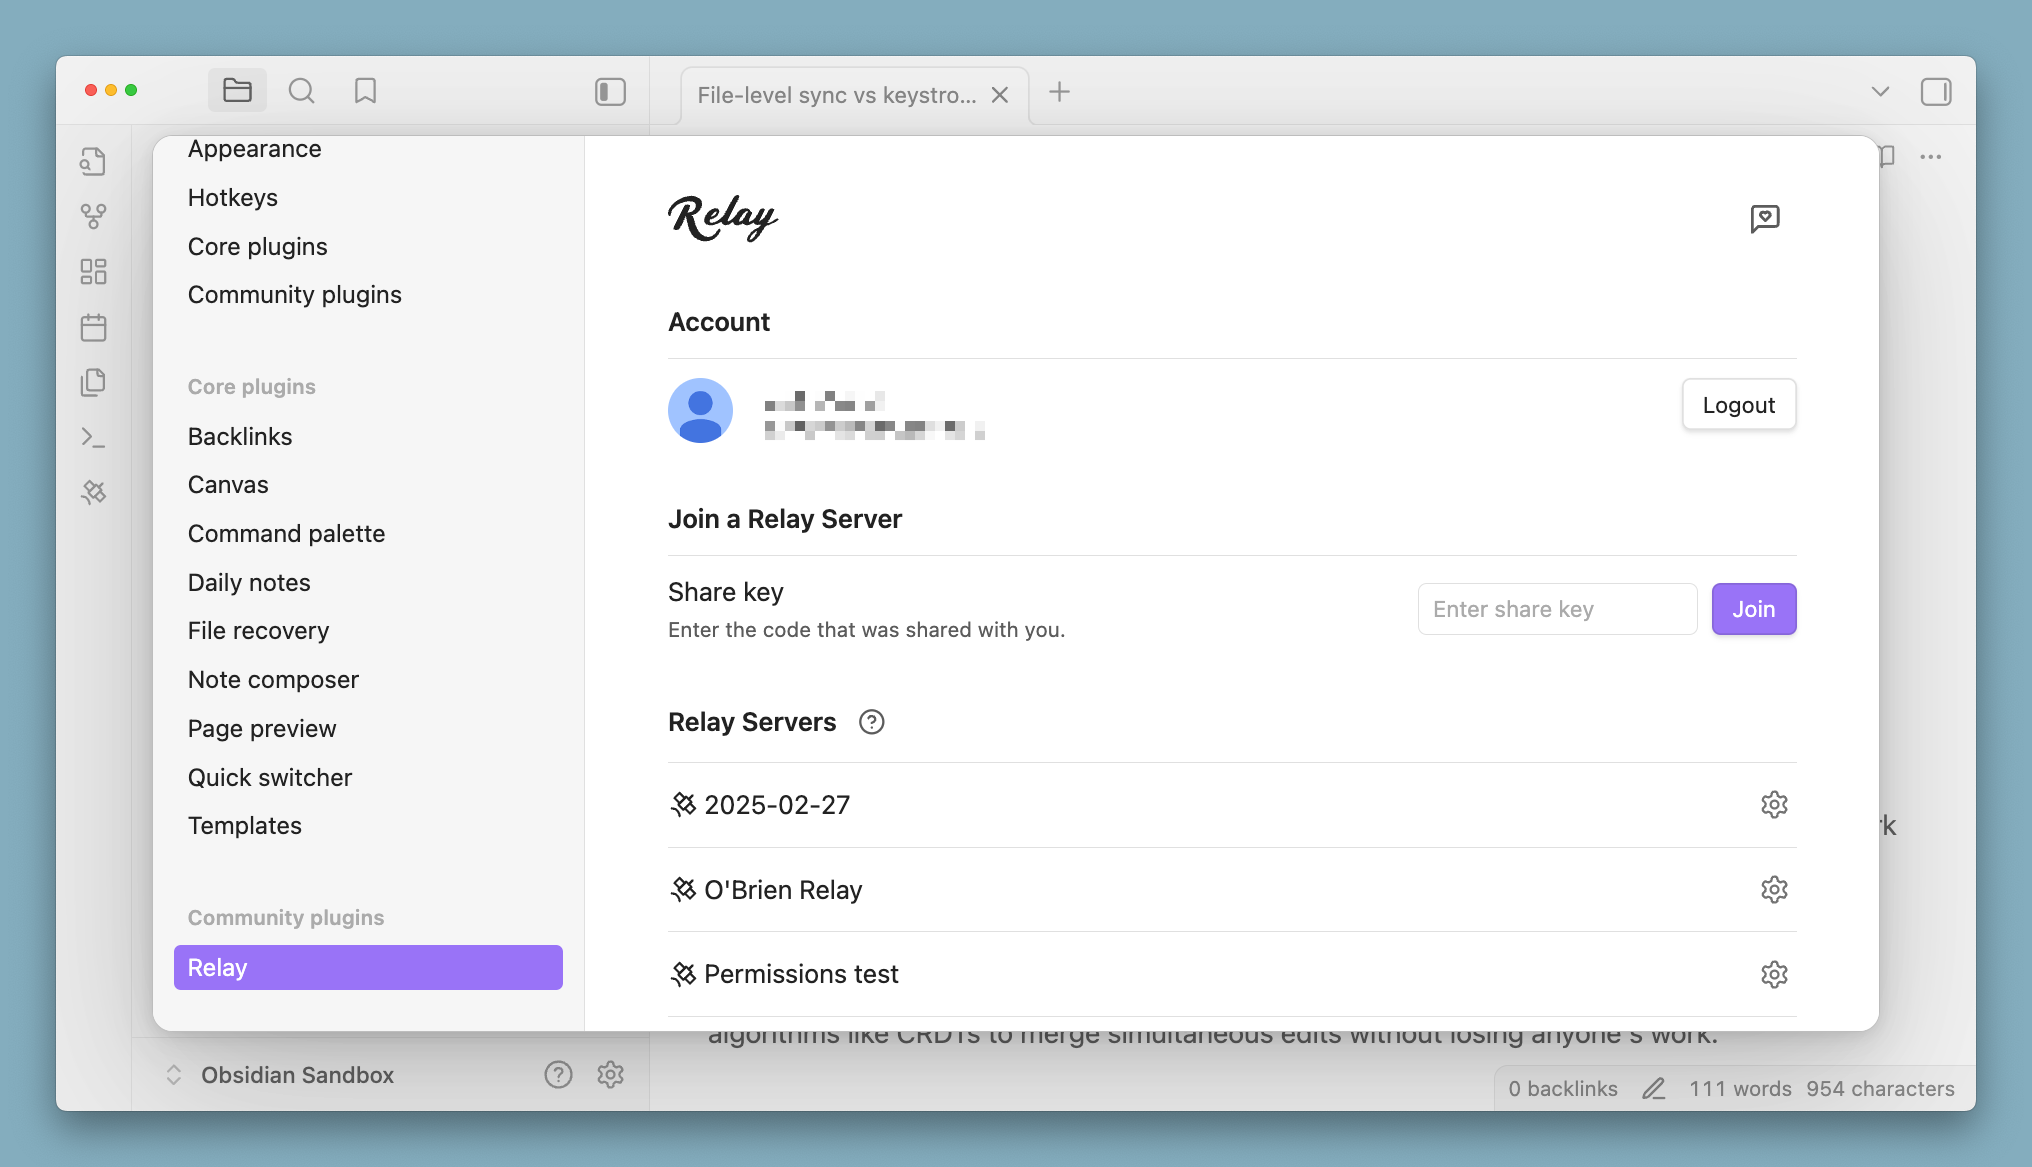
1. Access Relay settings
Access the Relay settings screen by clicking the Relay ribbon icon in the far-left sidebar.
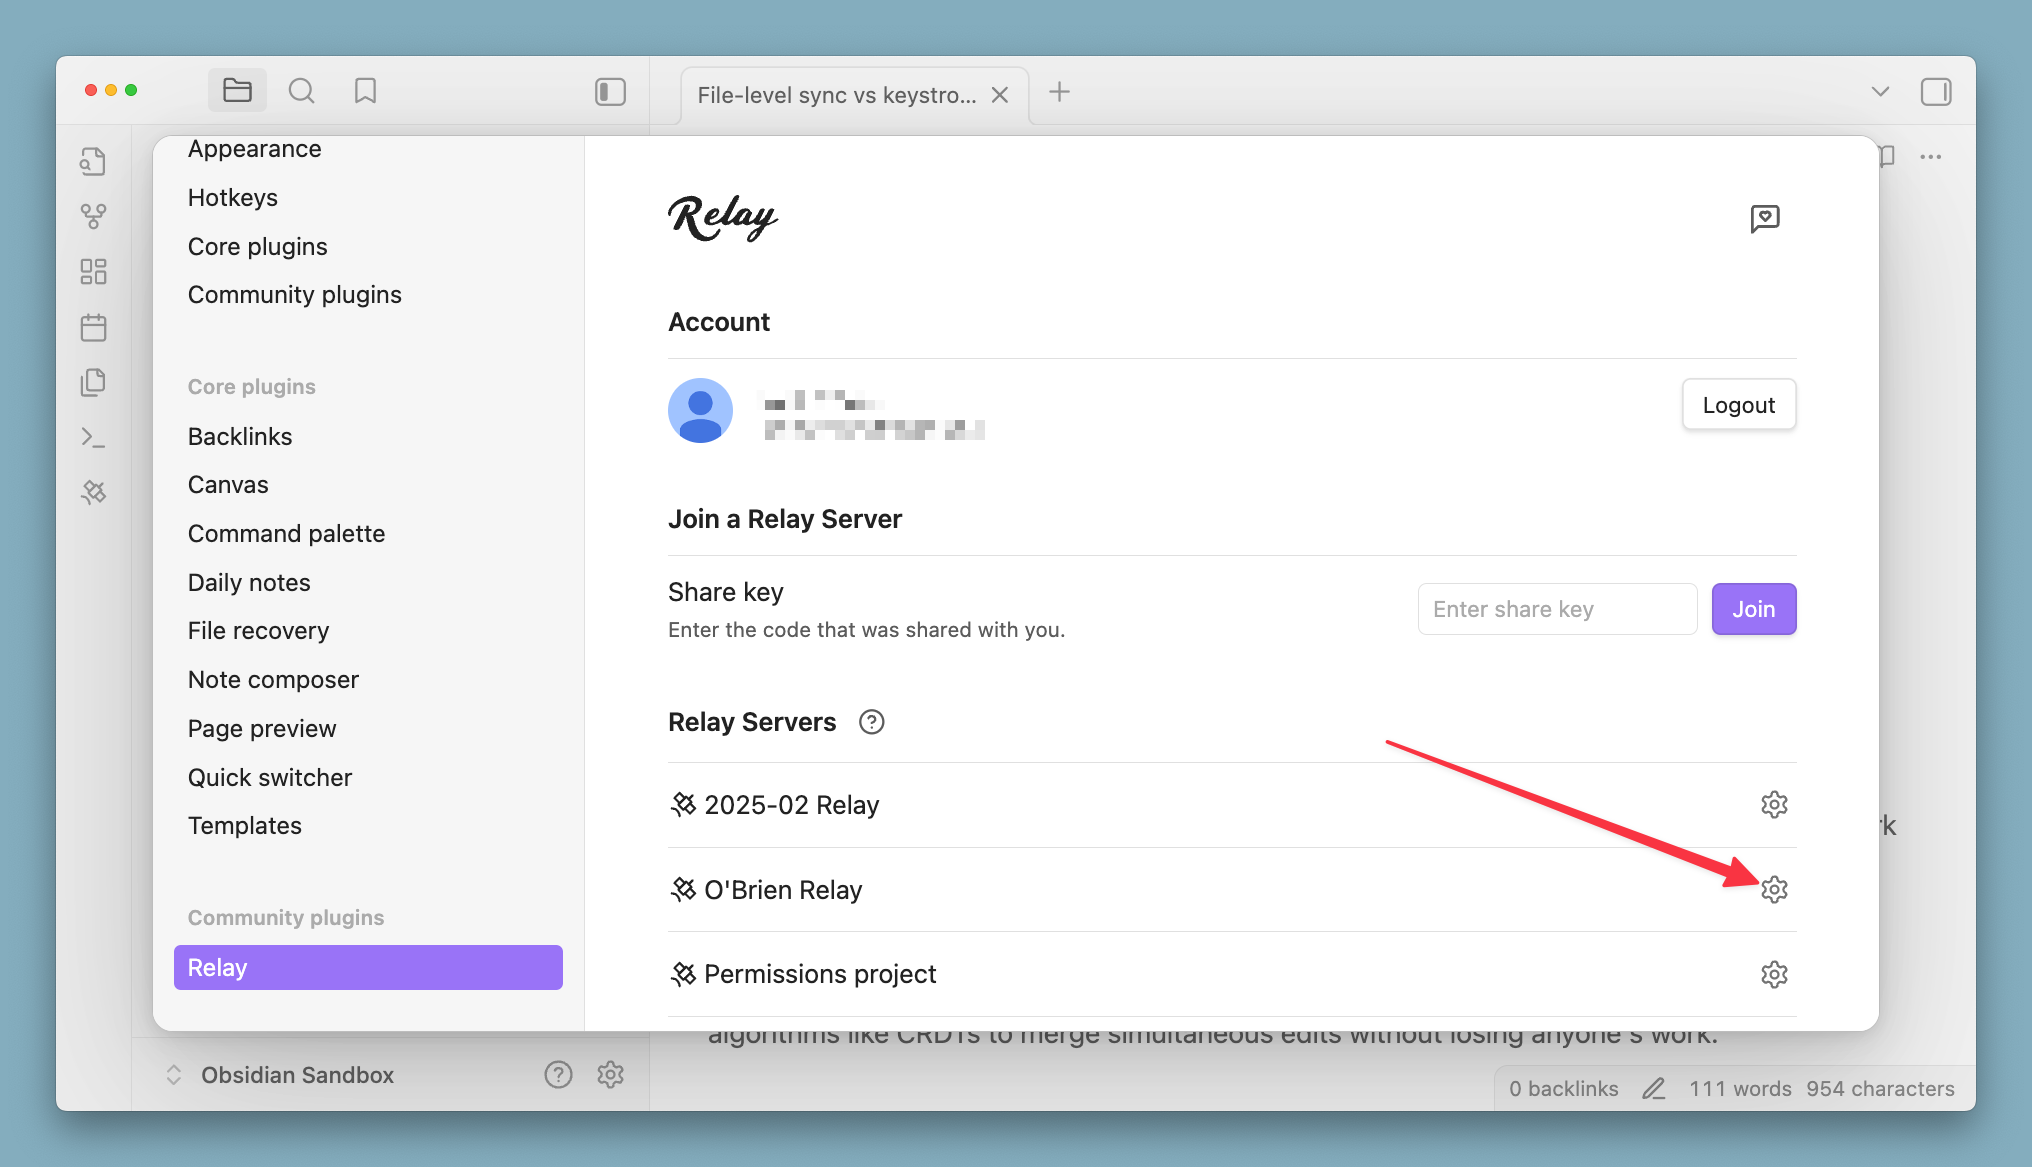
2. Select your Relay Server
In the Relay settings, you'll see a list of your servers. Click on the gear icon for the server you want to upgrade.
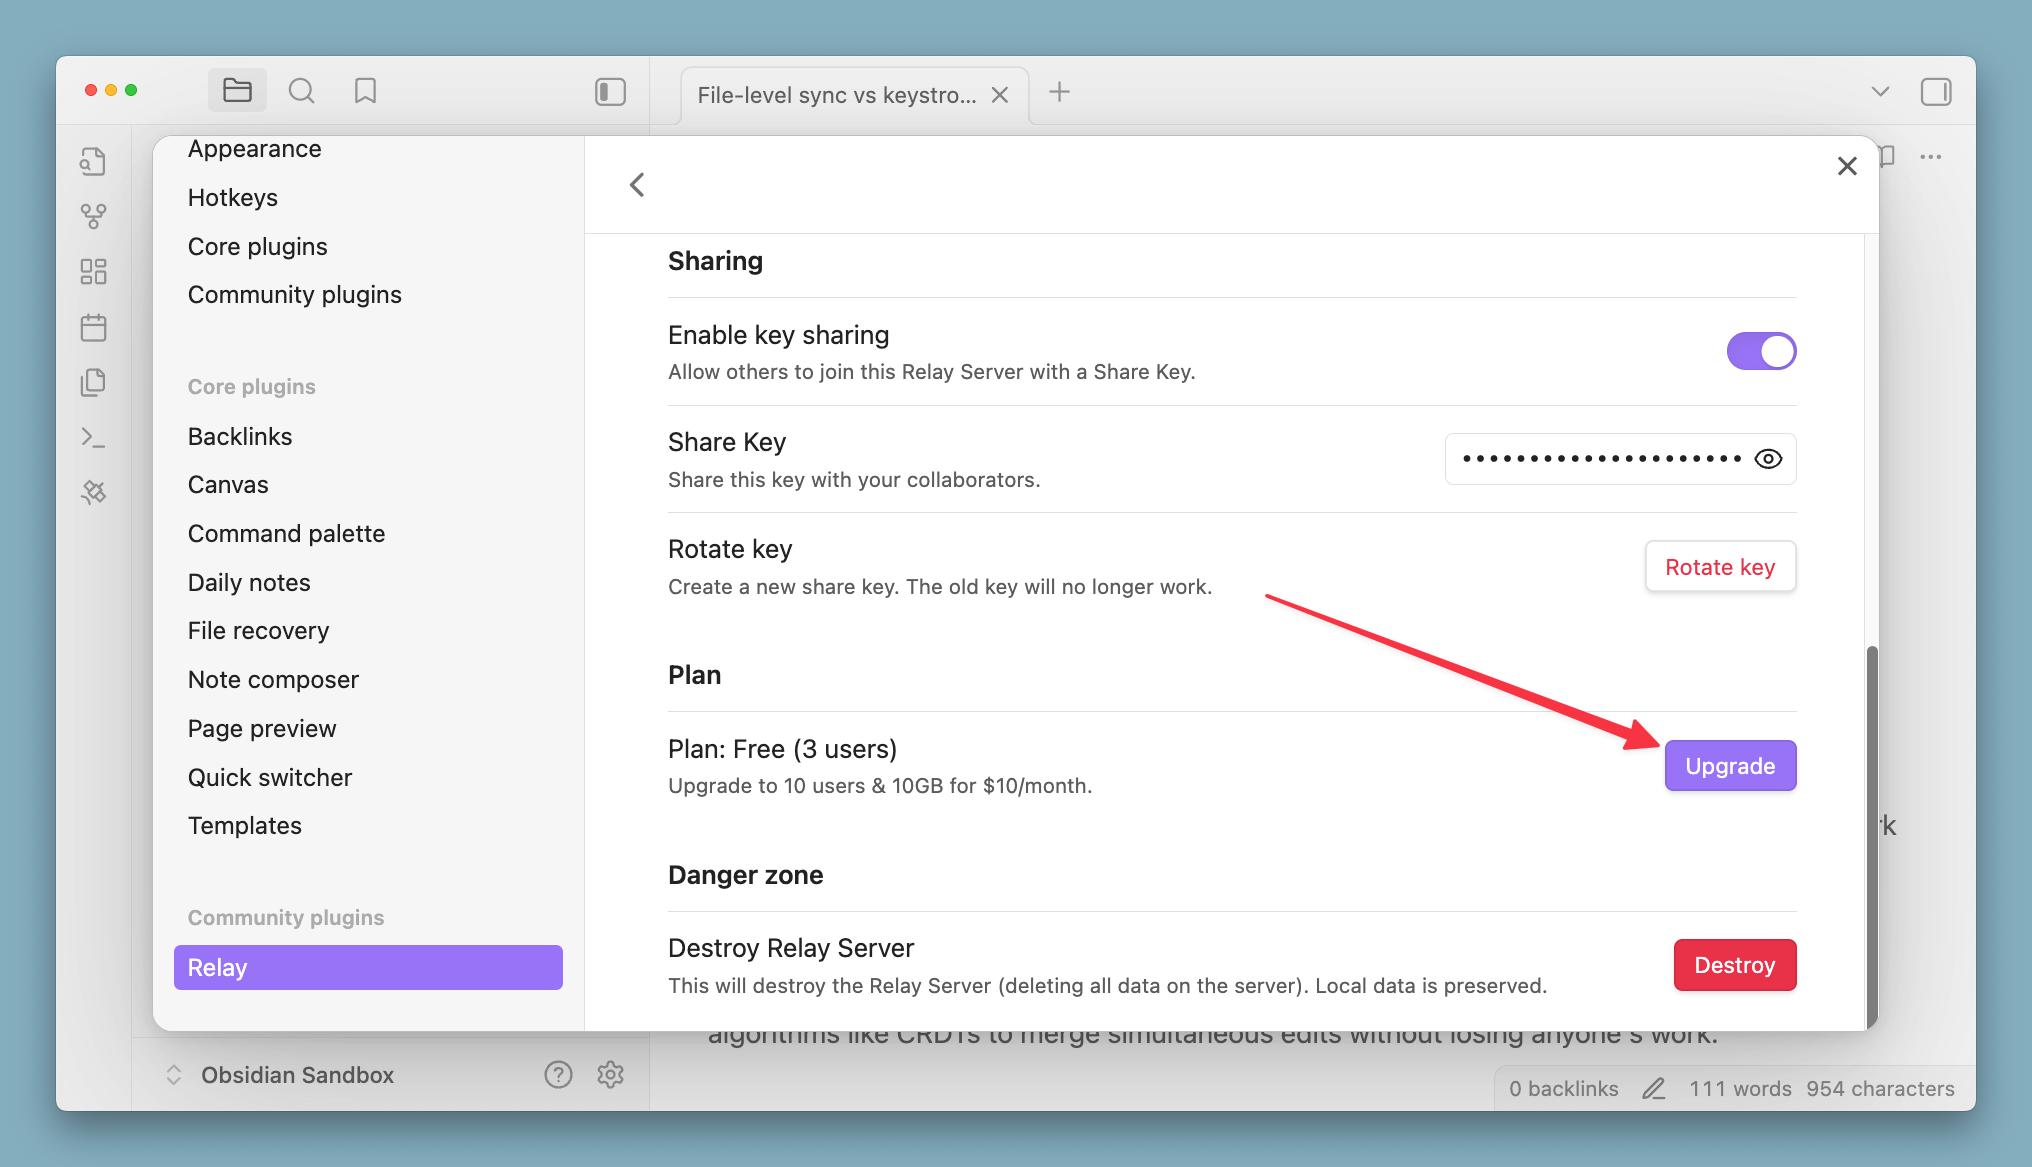
3. Hit the Upgrade button
Scroll down to the Plan section, find the Upgrade button, and hit it.
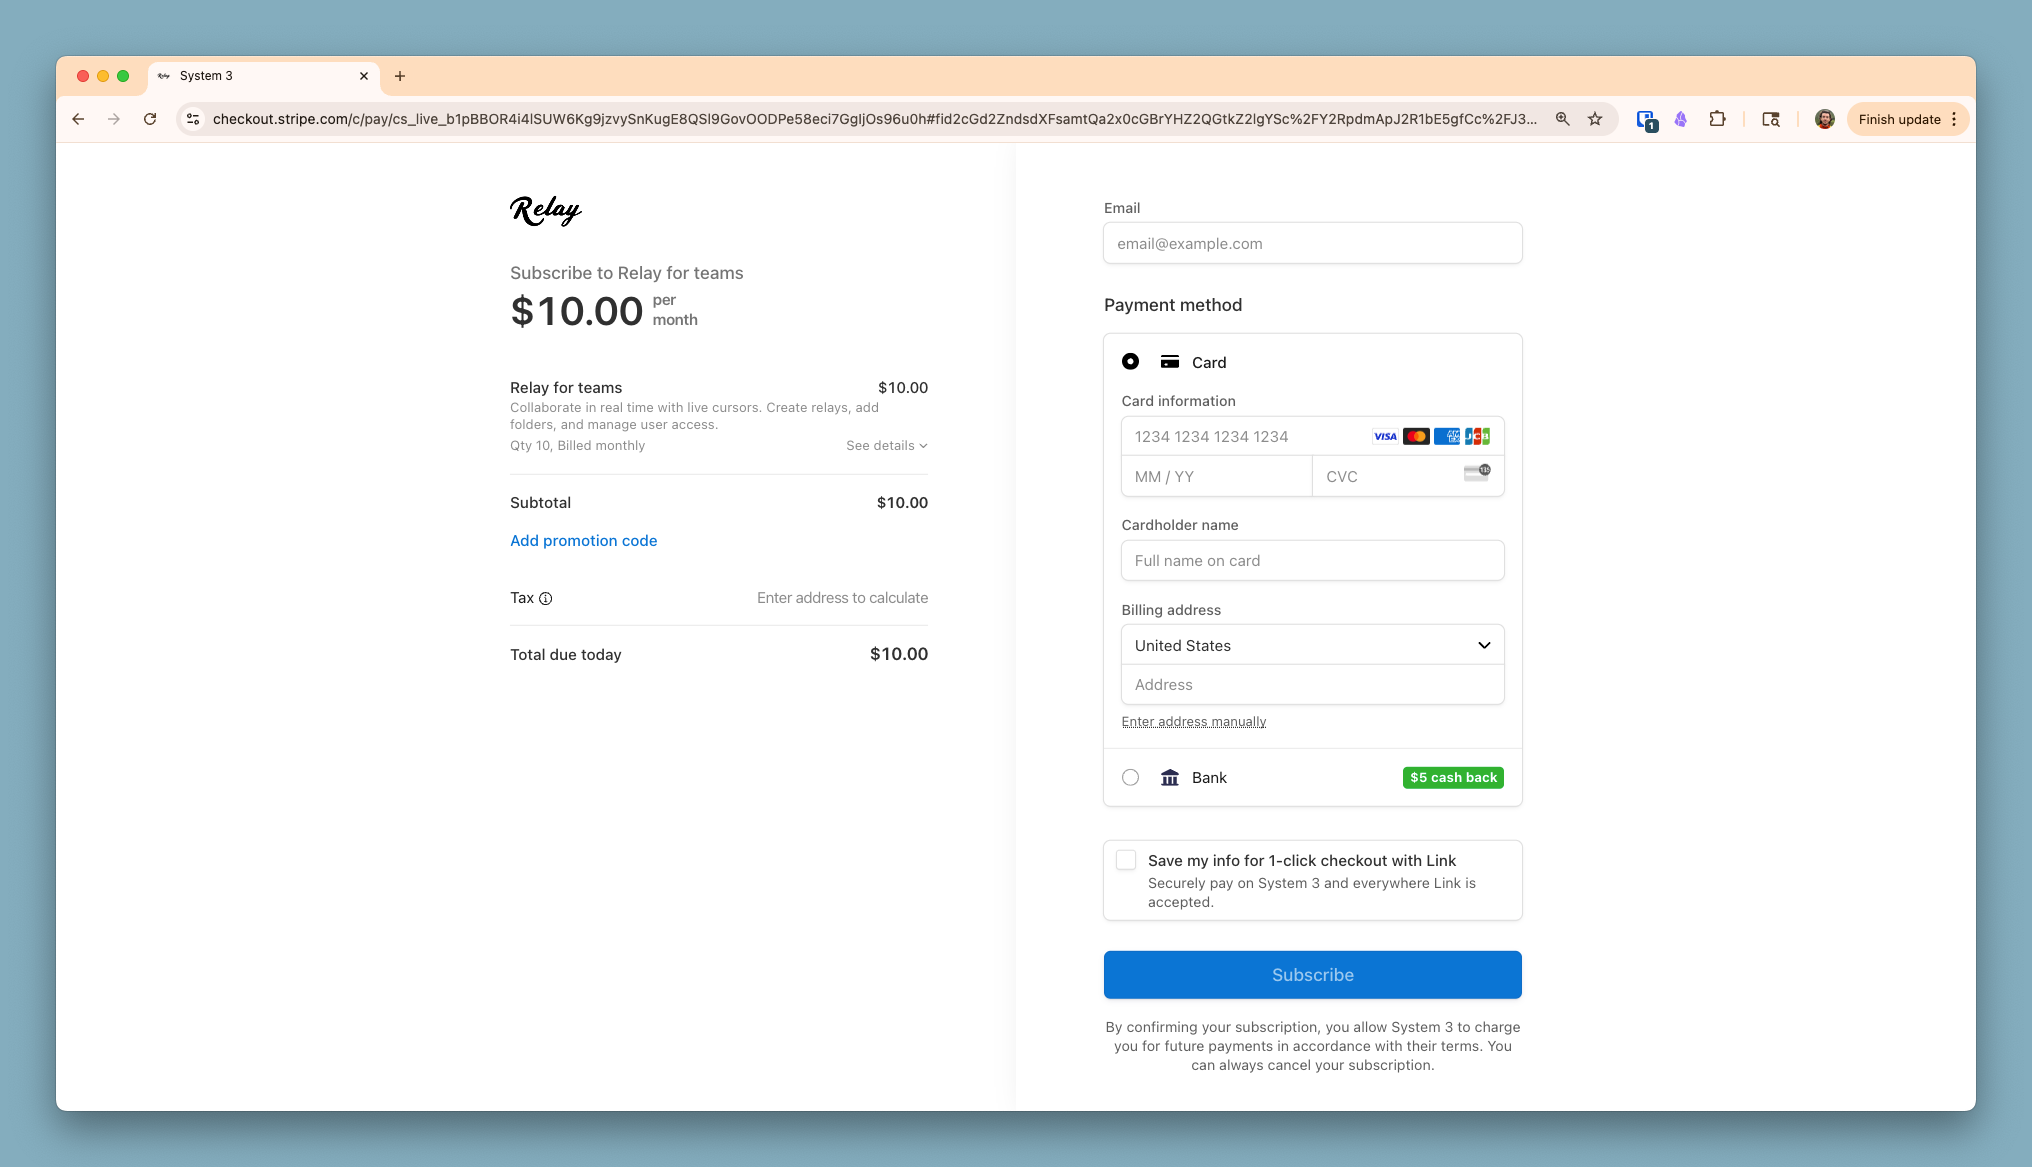
4. Enter payment info and subscribe
You'll be taken to a web page in your browser, where you can complete payment with Stripe. Enter your info and hit Subscribe to complete the upgrade.
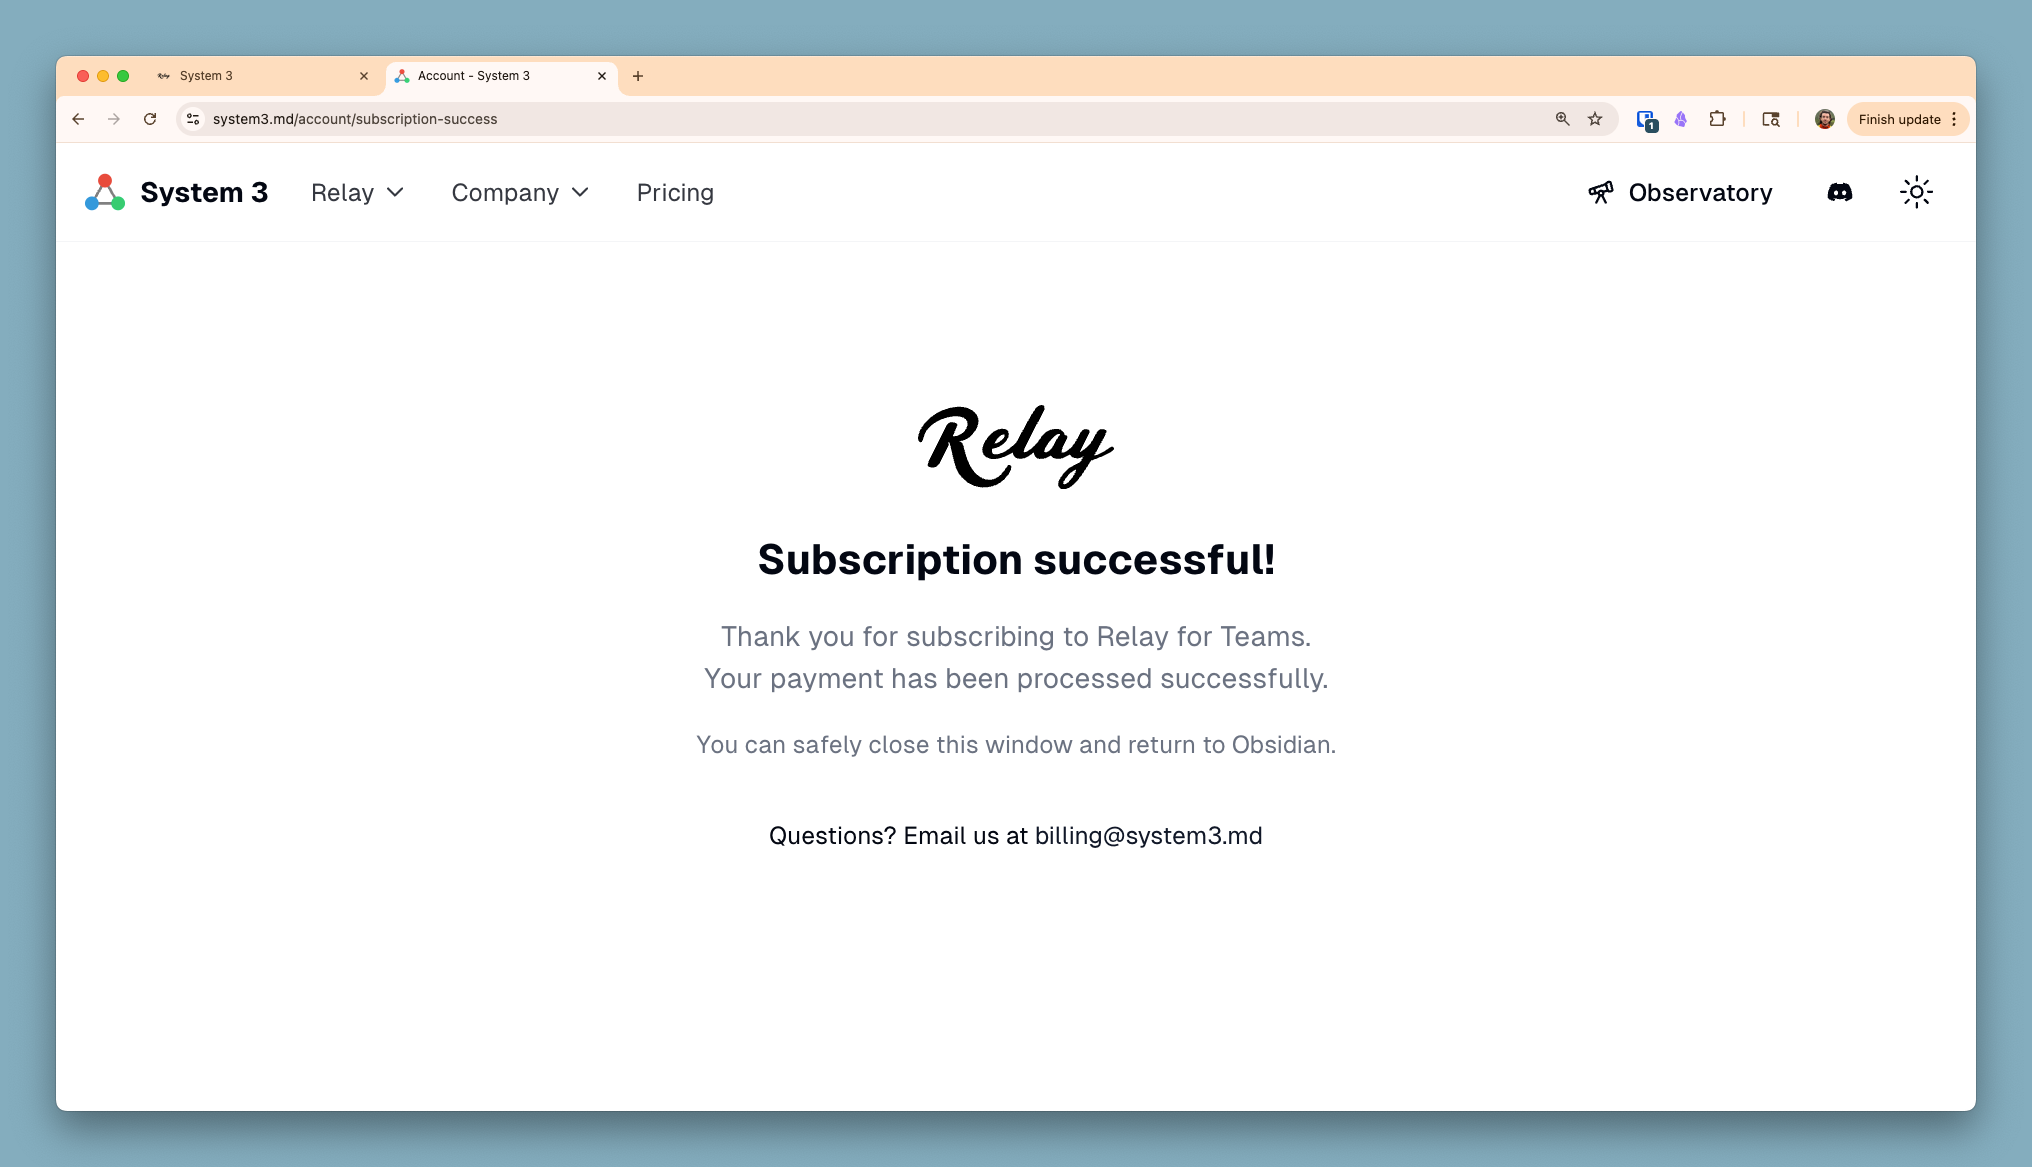
5. Success screen and back to Obsidian
If your purchase was successful, you'll see the success screen. You can now return to Obsidian and enjoy your paid tier access. We appreciate your support!
What happens after upgrade
Your Relay Server will immediately have all the features of the Team plan.
- Universal File Sync - Sync images, PDFs, videos, and other file types (not just markdown)
- Increased seats
- 10GB attachment storage - Binary files are stored on Relay servers and synced to all team members
- See https://relay.md/pricing for full list
You can cancel your subscription at any time from your server settings.
Troubleshooting
Don't see the upgrade option?
- Make sure you're the server Owner, not just a Member
Still need help? Join the Relay Discord for support.